0. Setup
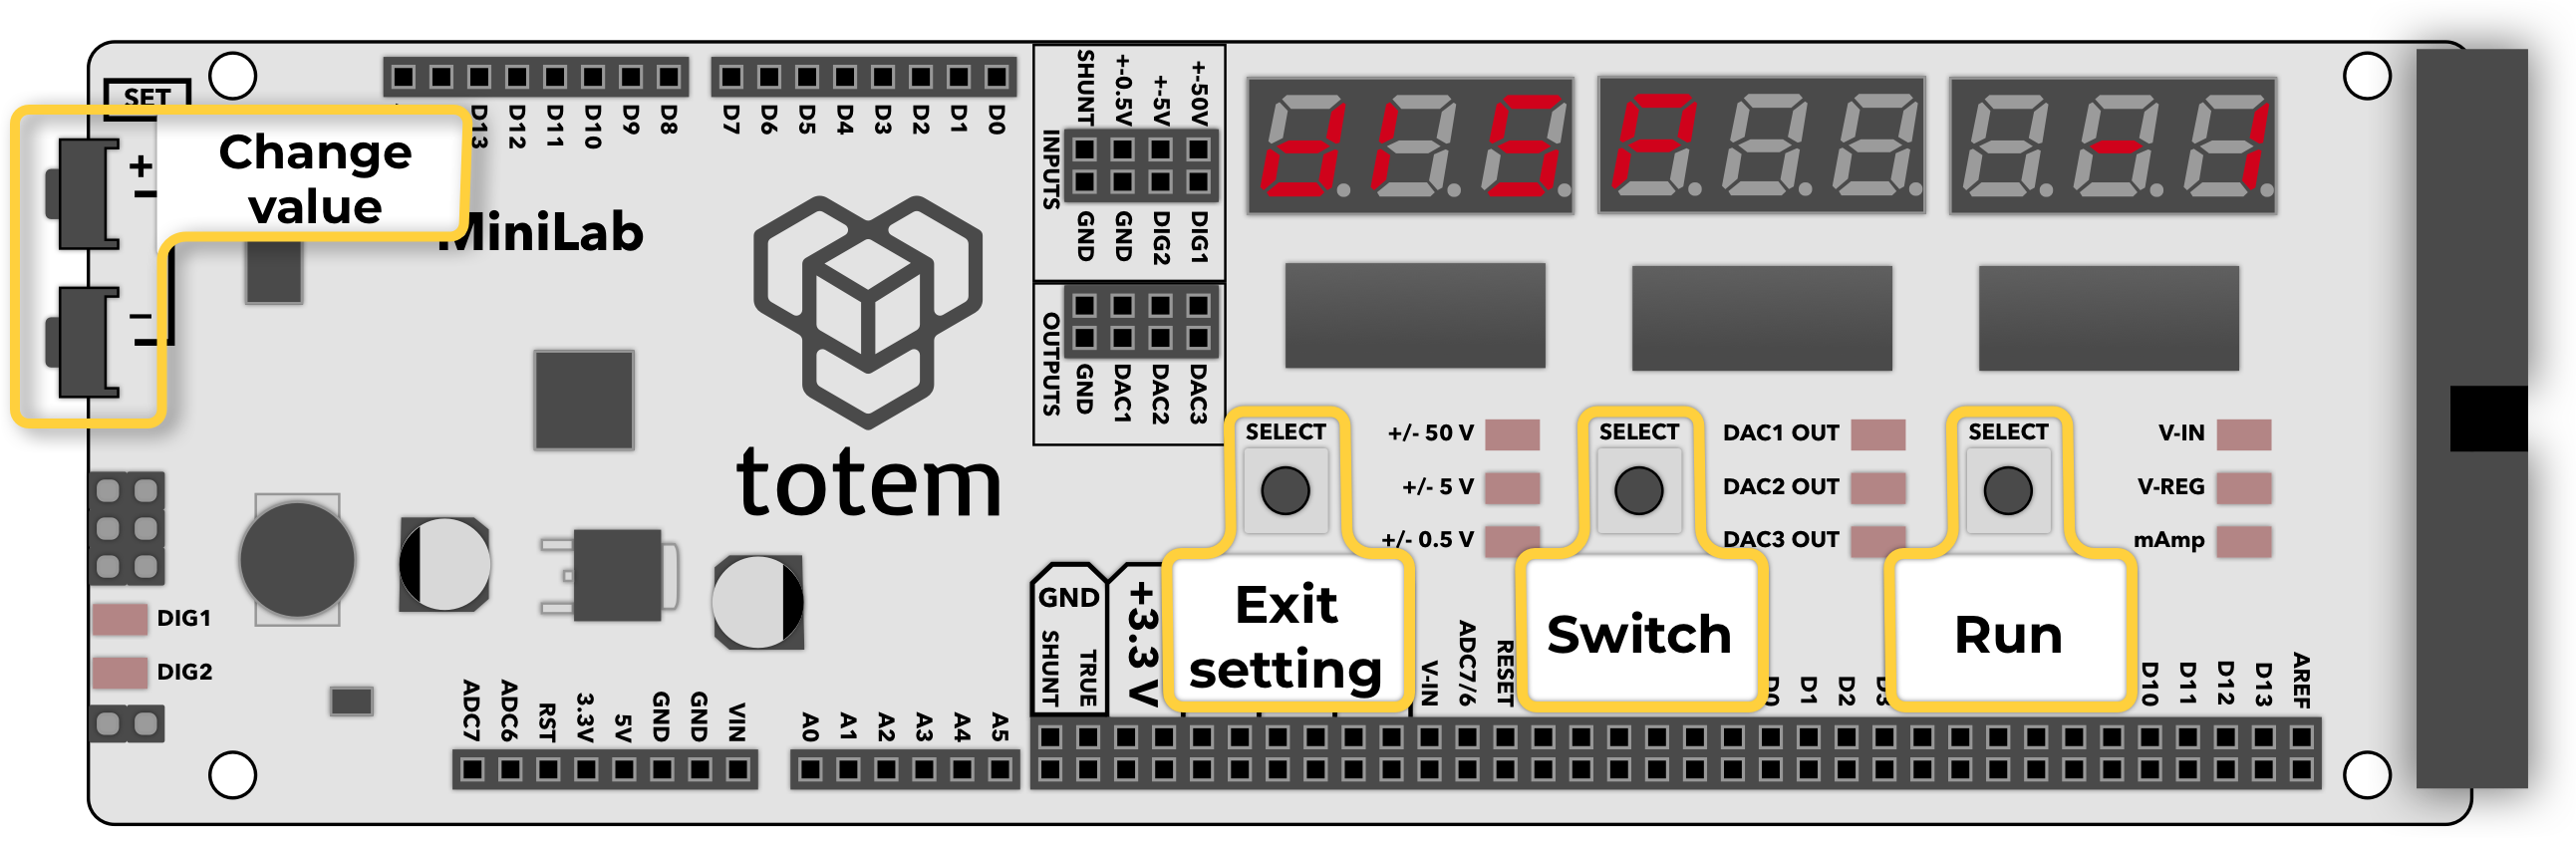
Menu to access various LabBoard configuration options.
These setting are stored in memory and used during LabBoard operation.
To exit selected option - press Left SELECT button.
Settings are saved when value is changed. No need to press a button for confirmation. Some menu options required to press and hold run button (Right SELECT) to execute specified action.
dISP- Display brightnessdAC- DAC output manual adjustAdC- Voltage measure manual adjustCALIb- Auto calibrationSERIAL- Default Serial mode baud rateUERSI- Firmware versionrESEt- Factory resetboot- Enter boot mode
Setup menu options
1. Display brightness
Change display and LED brightness.
diSP 7 will be shown and LED will light up to indicate current brightness level.
Using SET+ and SET- increase or decrease brightness level between 0 and 15.
2. DAC manual offset
Manually adjust DAC offset. Can be used to fine tune DAC channel output if value displayed on screen differs from multimeter reading.
dAC 0.000 will be shown and selected DAC channel LED will light up.
Click Middle SELECT to switch active DAC channel to configure.
Using SET+ and SET- increase or decrease offset.
3. ADC manual offset
Manually adjust ADC offset. Can be used to fine tune voltage measurements if value displayed on screen differs from multimeter readings.
These values are auto generated during calibration, but can be manually adjusted if required.
AdC 0.000 will be shown and selected voltage channel LED will light up.
Click Middle SELECT to switch active voltage channel to configure.
Using SET+ and SET- increase or decrease offset.
4. Auto calibration
This feature will calibrate ADC channels for more precise voltage measurements.
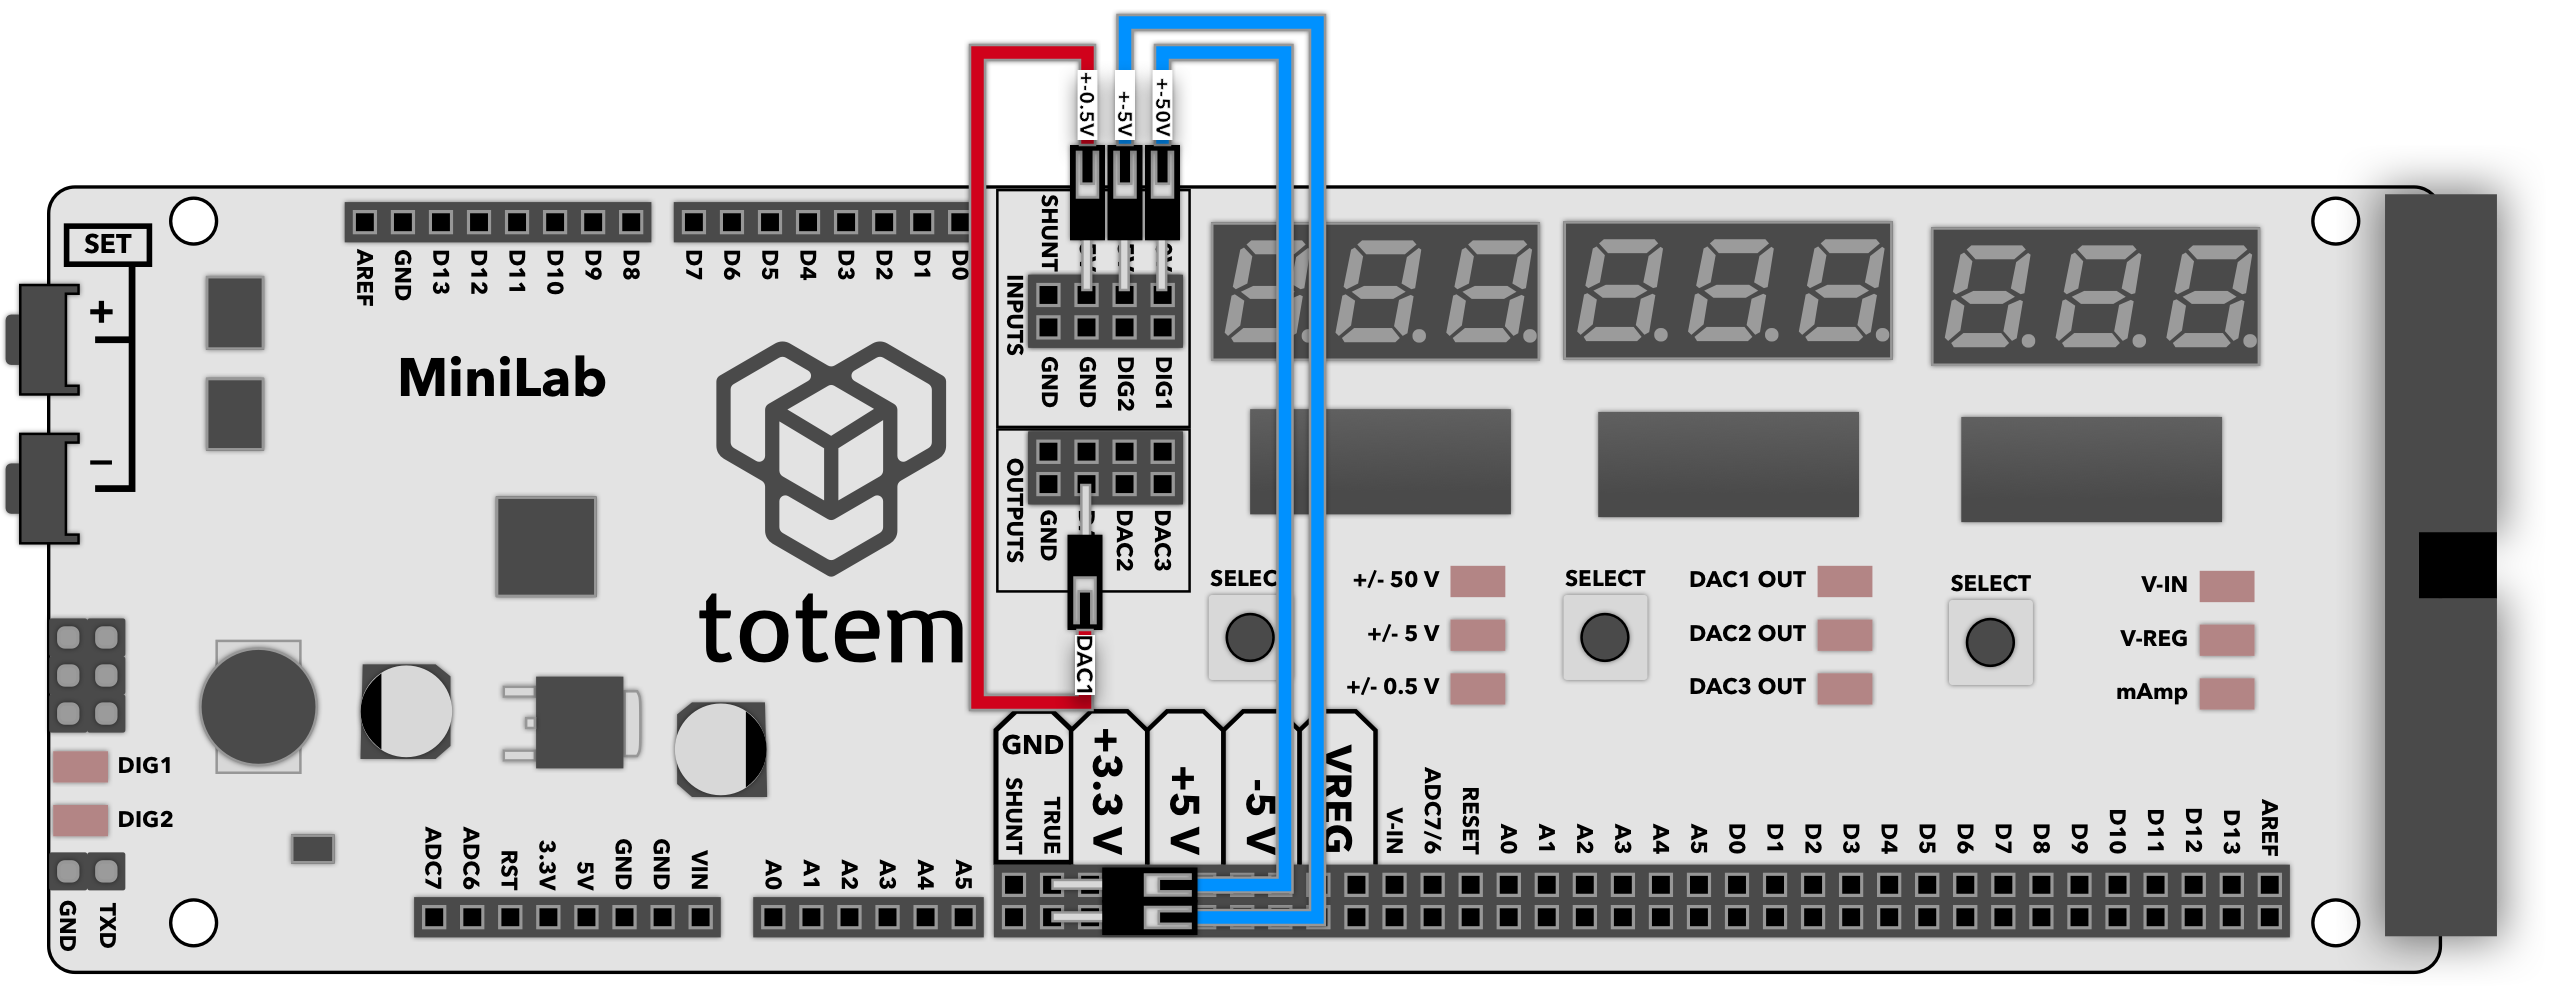
CALIb run will be shown. It is in waiting state until "run" button is pressed.
- Connect wires as specified:
- ±50V to GND
- ±5V to GND
- ±0.5V to DAC1
- Press and hold Right SELECT for 1s until calibration starts
888888888lights up. Wait for displaydonE- Press Left SELECT to exit
5. Serial settings
Contains 3 different serial settings:
- Default baud rate: selected default speed of serial mode
baud 57600 - Communication direction: selected value of endpoint device
ArduinoorPC - Always on (background mode): enable of disable Always on serial mode
Jump between settings by pressing Middle SELECT key.
Use SET+ and SET- to change value.
6. Firmware version
Display current firmware version.
UERSI x.xx will be shown indicating installed firmware version.
7. Factory reset
Factory reset option will reset all settings to default state. Calibration will be requested after reset is done.
rESEt run will be shown. It is in waiting state until "run" button is pressed.
- Press and hold Right SELECT for 1s until reset starts
donEwill be displayed brieflyCALIb runwill be shown. Follow calibration section to proceed
8. Enter boot mode

Enter system bootloader for firmware update.
boot run will be shown. It is in waiting state until "run" button is pressed.
- Press and hold Right SELECT for 1s
boot onwill be displayed- Run firmware download. Follow firmware update section