Setup Arduino IDE 1.8
 Arduino IDE stands out with its simple design, allowing to write a code, compile a project and upload it to the RoboBoard. This is one of the reasons why it's so popular among beginners. Aside from basic functionality, it has thousands of third-party libraries and code examples to create a project even faster.
Step 1. Download Arduino IDE
Go to Arduino website to download application for your operating system.
For this tutorial select version 1.8.x (not 2.2).
Install guide: Windows | macOS | Linux
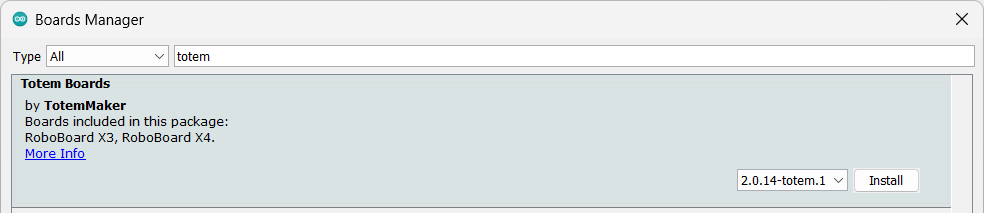
Step 2. Install Totem Boards
 Install
 Totem Boards extension to add support for Totem RoboBoard.
- In Arduino IDE select
File→Preferences. - Locate
Additional Boards Manager URLsand paste in:

If you have multiple URLs, click a button next to input field and add this link to the bottom.https://totemmaker.github.io/TotemArduinoBoards/package_totemmaker_index.json - Click OK.
- Select
Tools→Board→Boards Manager.. - In search field type in
totem. - Click Install and wait for it to complete. It can take a few minutes.
- Close Boards Manager window.
RoboBoard X4 (only)
Update motor driver firmware to latest version. See driver update guide.
Step 3. Compile and upload code
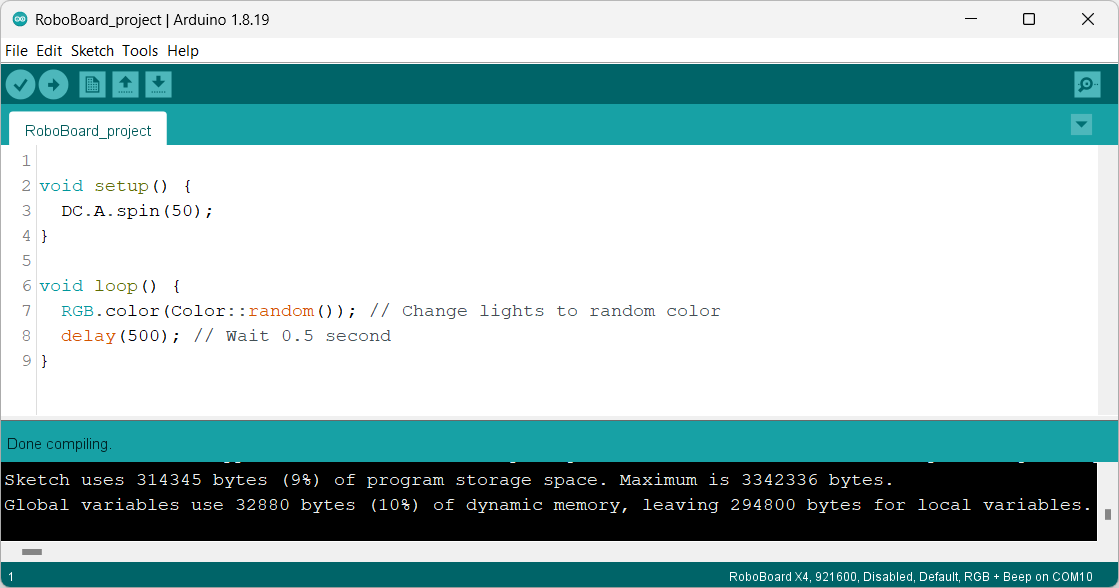
 Load example code and upload it to RoboBoard.
- Select
Tools→Board→Totem Boards→RoboBoard X4(orRoboBoard X3). - Select
File→Examples→> RoboBoard→RGB→ColorRun. - Connect RoboBoard to PC over USB cable and power it on.
- Select
Tools→Portand click on the port displayed there.
IfPortis not available - check if RoboBoard is on and plugged to PC with USB cable.
If there are multiple ports, disconnect USB cable and check which one is gone. Reconnect and select it. - Select
Sketch→Uploadand wait till it completes (can take a few minutes first time).
Note: in case upload fails - try selecting lower speed inTools→Upload speed. - RGB lights will start to blink in different colors. There is an example for each functionality, including a simple description.
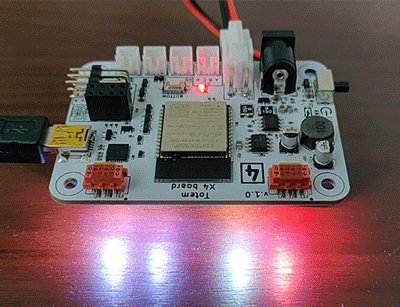
For RoboBoard X4 make sure the battery or DC jack is connected and power switch is turned on.
It won't work from USB alone!
Step 4. Project settings
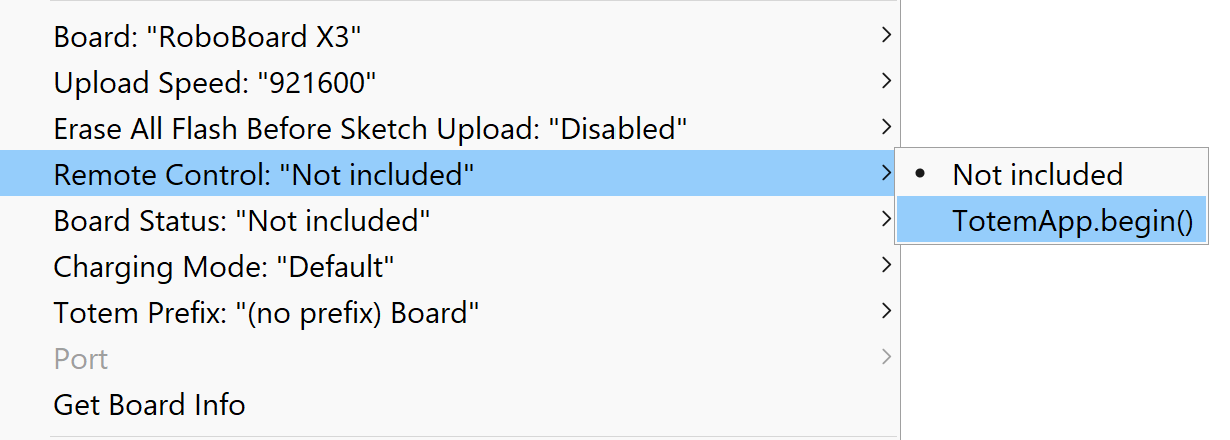
Menu option Tools contains Board settings that can change code build and upload parameters.
- Board - board type selection
- Upload speed - firmware upload speed. Use highest, unless upload errors occur
- Erase All Flash Before Sketch Upload - fully erase ESP32 flash before new firmware upload
- Remote Control - makes RoboBoard discoverable by Totem App when selected
- Board Status - enable RoboBoard status with RGB lights and beeping
- Charging Mode - enable RoboBoard X3 charging mode
- Totem Prefix - append "totem::" prefix to every RoboBoard function Totem Prefix
- Port - USB port name RoboBoard is connected to (required for Serial Monitor and upload)
Step 5. Using Arduino IDE
For more information about getting started with Arduino, read following topics:
User interface:
- Getting Started with Arduino IDE - walk around Arduino IDE UI
- Installing libraries - install third-party libraries
Code documentation:
- RoboBoard board settings - RoboBoard settings and default firmware
- RoboBoard API documentation - RoboBoard functions documentation
- Arduino code reference - Arduino functions documentation
Code examples:
- Connect GPIO and Qwiic - interface GPIO pins and Qwiic modules
- Interface with Totem App - read commands from Totem App
- RoboBoard code examples - RoboBoard specific code examples
- ESP32 code examples - ESP32 processor specific code examples
- Arduino examples / projects - general Arduino example projects
Question
Visit  Support page to find more information or help from our community.